You may not think you ever have to change a gun safe lock once you get one, but there are a variety of reasons for doing so. Most often, this is a compliment to the durability and long-lasting attributes of a gun safe. While the actual safe has few moving parts, your lock is far more complex and receives more direct human inputs. Each of these is a recipe for your lock’s lifespan to not match that of your safe.
Swapping out your gun safe lock may seem like a tall order for your average person. But it’s doable. Below, you’ll find some step-by-step instructions for how to remove your mechanical lock and install a new electronic lock on your gun safe. If you want to mitigate risk or if DIY seems difficult, you can always call the experts.
But, in the meantime, here are some general guidelines to follow for how to change your gun safe lock.
For those that prefer video format, you can watch A-1’s very own Robert cover the steps on how to change your gun safe lock below:
Step 1: Get Your Tools
First, you’ll need a screwdriver, some pliers and, preferably, a cordless drill. Be sure to have them on hand so you can avoid the frustration and inconvenience of starting the process, only to halt it so you get the right equipment.
Step 2: Remove the Back Panel of the Door
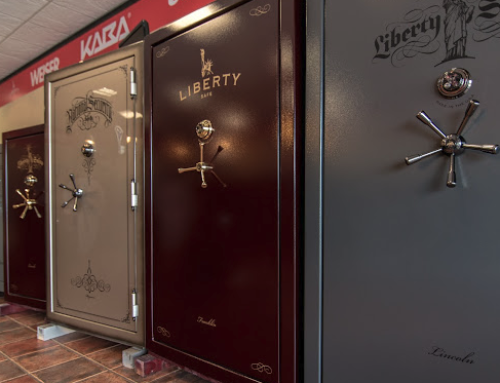
Open the safe and on the back, using a screwdriver, take the caps of the screws off the door. If it’s a Liberty Safe, for example, it will generally have four tapper screws located on the corners. Using the drill (or a screwdriver, if you really want), remove the screws on a low speed, nice and gentle. Once the screws are out, the panel will slide off easily. Put it to the side.
Step 3: Remove the Backplate
First, put the bolts in the locked position, as it’s recommended to ensure all lock components are out of the way as you change it. On the “mouse trap,” it’s also recommended to pull the springed element up and propped to the side so it doesn’t go off and make the process more difficult (which is why it’s often called a “booby trap”). Then you can remove that mouse trap by unscrewing a few screws. Just make sure you put the springed element back when you’re done!
Step 4: Remove the Spline
Using pliers, remove the spline key. It’s a small component that will be visible after you remove the backplate. Don’t mess with it too much with your pliers, as you can damage it. You’ll know you did it correctly if your dial on the front is locked into place.
Step 5: Remove Lock Body and Dial
Using the drill again, remove the four screws holding the lock body from the door. Then unthread the dial on the front to completely remove the lock. (Watch our video for more details about any of these steps, by the way.) Lastly, just remove the front trim and you’ll be done removing the old lock.
Step 6: Add the New Lock
Using the same holes that held the old lock parts, add the new components using the lock manufacturer’s instructions. This will include mounting the front screws, feeding the keypad through and installing it, adding the lock body and backplate and then plugging in the cable and adding the battery. Don’t forget to put the springed element in the mouse trap back to its original position.
Step 7: Test It!
Keeping the door open, test the code on the front and make sure it unlocks the safe properly before you add the back panel of the door back.
Step 8: Replace the Back Panel
Once you confirm everything has been changed properly and that your new gun safe lock is working, you can put the safe back together like it was initially. The main part of this will be adding the back panel to the back of the front door, followed by the screw caps.
There you have it! You now know how to change your gun safe lock. If you need additional help, don’t hesitate to contact A-1 Locksmith today—either to ask questions or hire us to change your gun safe lock for you.


